Tuesday, December 11, 2012

Giveaway winner!

A super speedy post to wish a big congratulations to #34 Shanna, who, via random number selection, is the winner of a copy of my new book. I hope you love the book Shanna!!


Can you guys believe we are nearly half way through December? Where is the time going?! If, like me, you're looking for last minute gifts that are easy to stitch up, I still have some Llama Pillow Panels and llama fabric in stock and can ship right away :) (The completed pillows are not available, only the DIY panels...)


Sunday, December 2, 2012

My new book! And a copy to share with you. Giveaway!

It's been under wraps for a while now, but I can finally share the exciting news that I have a 2nd book! I can frankly hardly believe it! It has started shipping this month and I'm so excited that its finally making its way into the world. This project would not have been possible without the AMAZING collaborators that I was able to work with.

When I set out to write this book and I began to consider the huge range of skills that should be featured in a book all about fabric embellishment, I immediately knew it was an opportunity to get to collaborate with some of my most favorite artists and crafters who could really show off their chops as specialists in their own unique techniques. Without their contributions and creativity, this book wouldn't be nearly as rich and visually lovely as it is.

So you ask... What's the book actually about? Its absolutely stock, chock full of detailed step-by-step instructions on a wide range of embellishment and surface design techniques and demonstrates those techniques in a modern way. Each chapter also includes interviews with the chapter author, where they offer their own personal advice around design and embellishment. Here's a high level run down of what you'll find.

The book starts with an overview of a wide variety of the tools and supplies that you might want to consider when embellishing fabric and I touch on the different types of most commonly available fabric and suggested approaches for embellishment.

Chapter 2, Designing Patterns, was written by Heather Dutton of Hang Tight Studio who shares her techniques for creating hand rendered and computer rendered patterns. I met Heather through the Spoonflower community and just adore her designs. She shares some great tips and offers some great advice on designing digitally.

Part 1 of the Printing Patterns chapter was written by Amy Prior and Carly Schwerdt of Umbrella Prints. These two talented ladies cover a broad number of wonderful techniques for screen printing using stencils, blocks, heat transfer and more.


Also in the Printing Patterns chapter, Christina McFall showcases cyanotype printing and toning. If you're not familiar with the technique, its a photographic printing process that will set your heart racing. Plus Christina shows off a few goodies she's made using her fabric that are simply phenomenal.

Dyeing and Bleaching techniques are tackled by Sara Harper of Five O'Clock Crows. From using natural dyes, dip dyeing, over dyeing and batik, Sara has done a wonderful job of detailing the many different ways you can use dyes and bleach with your fabric projects.

Then the simply lovely and delightful Meghan Van Sipe of Lilac Saloon showcases an enormous range of inspiring and totally awesome techniques for using beads, zips, studs, ribbons, buttons, felt and more. My own personal list of must-do projects has gotten a bit longer based on what I learned from Meghan.


Needlepoint and Applique are showcased by my dear, sweet and talented friend Rachel Hobson of Average Jane Crafter. She's done an amazing job of demonstrating how to use hand work to add something extra to your designs. Rachel has long been my inspiration for ways to really use handwork to make a piece special and I was so thrilled to be able to work with her on this book.


Each chapter includes galleries of carefully curated images which feature the techniques from that chapter. When we were putting together the book, so many wonderfully talented and kind people agreed to let us showcase their work. Without their work, the book wouldn't be everything I dreamed it would be.

The final chapter features several supremely talented designers who have taken their craft to an entirely different plane. They have graciously shared their insights into developing collections, staying true to your style and and going pro with you designs. In this chapter I also share some tips on marketing your work.

There are two editions of the book. Although the book will be available from loads of book sellers (thank you booksellers!), you can also pick them up on Amazon here. The US version and the UK version are both shipping now.

One thing to note, the cover of the UK version is actually different from what Amazon UK is displaying. Some changes were made to it since I guess that was provided to the booksellers. Oh... the mysteries of publishing! But the cover of the US version is just like what is shown above and the content in both editions is identical. p.s. I had so much fun making the piece for the US cover! Now I just need to figure out what to do with it. Thinking wall hanging for my studio but still not sure :)

So... Now who wants a copy of the US edition?! Just leave me a comment here and I'll draw a winner on Monday, December 10th. I'm happy to ship worldwide so everyone is welcome to enter. I'd love to hear what section of the book you're most looking forward to reading!


Wednesday, November 28, 2012

So this happened...

Look at what the UPS man dropped off on my doorstep this afternoon? Couldn't wait to share it with you!! More details and a free copy to giveaway before end of week. Soooo excited!

The US version and the UK version are both shipping from Amazon now.


Friday, November 16, 2012

Modern Designs for Classic Quilts Book Giveaway Winner

It was such fun to hear all about the projects on your 'someday' lists. And it makes me feel so much better to know that all of you have super long lists too!! Congrats to the lucky winner Margaret, #100 (chosen by random number), who said: A quilt on my must do list is a dresden plate. I bought the templates for the cutting and have some fabrics that I am stashing but I am fairly intimidated about the process so I have not started one yet.

I hope you love the book Margaret. Make sure you drop Andie and Kelly a line and let them know you were the lucky winner. :) I know they'd love to hear from you!

And for everyone else who didn't win, make sure you pick up a copy of the book. It really is filled with some wonderful and inspiring projects.


Oh my gosh...I can hardly believe Thanksgiving is next week! I've got to go clean out my fridge and get the house ready for company. Everyone have a great weekend!

Monday, November 12, 2012

Modern Designs for Classic Quilts Book AND a Giveaway

When I was in Houston at Quilt Market a few weeks ago, I was tickled to get to meet Kelly Biscopink and Andrea Johnson. These two adorably sweet and funny ladies are the amazingly talented duo behind the new book, Modern Designs for Classic Quilts


Not only did I get to meet Kelly and Andie, I got to meet a few of the quilts from the book. :) There's a Dresden Plate quilt that I was especially excited to see since its made from my Tufted Tweets collection. And Oh. My. Goodness. Gorgeous simply doesn't do this quilt justice. Kelly's piecing is impeccable, I love the incredibly unique layout she came up with and the quilting (by the amazingly talented Angela Walters)  is superb. 

One of my favorite things about Kelly and Andrea's book is how they have taken traditional quilt patterns and infused a really modern sensibility to them. There's something uniquely special about the projects in the book too. I can almost always find one or two projects in any book that I'd love to make, but there's so many in their book that are now on my 'must make someday' list.  The quilt on the cover is one that I think will be my next big project. And in reading through the pattern, its beautifully written, clear and easy to follow. Can't wait to start pulling fabric for it!

And how about this amazing Flying Geese lovely by Andie? I know, amazing, right? The simplicity of the pattern is just so sophisticated isn't it? (Also now on my must make list!)


And here's the best part...Kelly and Andrea were nice enough to give me an extra copy of Modern Designs for Classic Quilts to give away to one of you! To be entered to win, just leave me a comment here and I'd love to hear about a project on your 'must make someday' list! I'll draw a winner  on Friday 11/16/12. 

Good luck!

Wednesday, November 7, 2012

Giveaway winner and free quilt pattern

Thank you so much! You guys shared some paper piecing tips galore! I pulled out a few of my favorites and compiled them below, so as soon as I'm ready to start my own picnic blanket with Don't be Crabby and Amy's Crabby pattern I have your great advice to guide me. :)

- take your time, be patient and don't rush
- measure the width of the part that you are going to piece, then cut strips with a some extra
- don't be afraid that you're wasting fabric
- use Easy Mask paper that you find at the paint store. It comes on a roll in widths multiple of 3" (e.g., 6", 9", 12", etc.), is very thin for your perforations, but sturdy enough for feeding through your inkjet printer. Best of all it's very inexpensive and can be cut to whatever lengths work best for your pattern, unlike regular printer paper. 
- the freezer paper method which I much prefer over the method where you spend hours picking out bits of paper
- tack small pieces really well
- shorten your stitch length to 1
- backstitch at the beginning and end of each seam to secure it
- don't scrimp on the fabric so you ensure you're covering all the section
- check and double check your fabric will cover the section
- iron, iron, iron
- the add a quarter ruler makes it easy to figure out where and how much to trim. 
-remember, you are working from the wrong side, so whatever you're making will be the opposite of the pattern.

And now for our giveaway winner. Congratulations to #118 Cindy who said:
LOVE your fabric! It just makes me happy when I look at it. I'm new to paper piecing too, so my advise as a 'newbie' is to use larger pieces of fabric then you think you'll need. It's a little wasteful, but until I really know what I'm doing, it is saving me from having to rip out seams. :) Thank you for the opportunity!!!
I hope you love the fabric Cindy!

Don't be Crabby starts shipping in December (which is right around the corner!) so it will be making its way to your favorite LQS store super soon. In the mean time, make sure you grab a copy of this adorable FREE pattern, Come Sail Away, from the team over at Robert Kaufman. I love the little whale in the bottom right corner. And the sailboat with the whale on the side... And.... And....


Friday, November 2, 2012

Paper pieced crabby pattern AND a giveaway!

Ya'll know that I get all geeked out when I see what creative and lovely things you make with my fabric. Well, you are going to get all geeky with me when you see this!

Amy over at During Quiet Time agreed to make something special from Don't be Crabby to help me show off the new collection (starts shipping in December). I love the paper pieced patterns that Amy designs, so I was just giddy with excitement when she said she was going to design a paper pieced Crabby. Eeeep! Are you ready? You should probably sit down. No, really. Sit down. Ready?


Again. Eeeeep! Is that not one of the cutest things you have ever seen? Ever? Amy designed the paper pieced pattern based on the little crabby in my fabric and made this incredibly fabulous beach bag.

And I love the way she incorporated more of the prints from the collection for the back and sides of the bag.


And look at the little wave lines she quilted between the rows of the boats. So sweet. 


Today you have two (yep, two!) chances to win both a FQ set of my entire Don't be Crabby fabric collection plus a Crabby paper pieced pattern from Amy. 


For chance #1, leave me a comment here (and make sure to include a way for me to contact you). I haven't tried much paper piecing, so if you have any advice, I'd love to hear it. Or if you're new to paper piecing too, just let me know what you might make with the fabric and/or the pattern if you were to win! I'll draw a random winner on Wednesday 11/7/12.

Amy also has a full FQ set and a Crabby pattern to giveaway too! So hop over there next. Two chances to win all sorts of Crabby goodness :) Amy's adorable pattern is available in her Craftsy store and over on Etsy. Here's some details about the pattern :)
--The  block measures 10" x 8" finished. 
--It's an intermediate paper piecing pattern but there are no Y seams or curves.


 I can't wait to try my own Crabby!! I'm thinking beach blanket maybe...And good luck!

Friday, October 26, 2012

Don't be Crabby Bag (and a giveaway) by Pink Penguin

Happy Friday everyone! Another quick post before I head out to Market this weekend. A few weeks ago, the wonderfully sweet and incredibly talented Ayumi over at Pink Penguin agreed to help me show off my new collection, Don't be Crabby (shipping Dec '12). I was beyond excited to see what she would make and as usual, she created something simply adorable. Look at the little bag she made? So cute, right? :)


So....who wants some Don't be Crabby fabric?! Hop over to visit Ayumi at Pink Penguin before Monday 10/29 and leave her a comment on her post. She's giving away a FQ set of the collection and I'll be shipping it out to the winner. Good luck!


Giveaway winner

Thank you for playing along during Donktober and sharing all of your donkey stories! And as promised, via random number generator, we have a winner of a FQ set of Jack and Jenny! 

Congrats to #71 Fran who said...
I love the story behind these fabrics. I don't have any donkey related tales of my own but they're an animal that I've always really liked. I'd love to make a quilt for my friend's little boy, he's very fond of donkeys at the moment! Thanks for the chance to win.


Everyone have a wonderful weekend. And if you're heading to Quilt Market this weekend, I hope I'll get to see you there. Please come say hello!!

Sunday, October 21, 2012

Donktober | And a Jack and Jenny Giveaway

Donktober. What Donktober you ask? Well, I had the same question when Erin at Missy Mac Creations emailed to invite me to participate in her Donktoberfest! And come to find out that its a celebration of all things donkey and craft related, so of course I said count me in!

When I designed Jack and Jenny, it was after a rainy vacation to Greece where there were some donkeys in a field and I really wish I had my wellies with me so I could go slog through the mud to visit them. (Who would think to pack wellies for a beach vacation to Greece!?) They looked so cute out there, but there was no way I was going to be able to slosh through that field in order to get out there for a proper hello (especially since I was a teensy bit bitter about the rain putting a damper on my supposed to be sunny beach holiday!) The memory of those cuties out there sort of stuck in my head and in my round about way,  my Jack and Jenny donkeys in rainboots collection was born. I just love what sweet faces donkeys have, don't you? And those big long ears? And now they get to wear sassy rain boots.


For inspiration, here are some projects I made using Jack and Jenny. I'm still hoping to make myself a pair of PJ bottoms soon :)

Skirts and tanktops for the Tam Ky Orphanage project

Baby blocks I made for a friend. 


So in celebration of Donktober, for all of you donkey lovers out there, I'd love to send you a FQ set of my Jack and Jenny fabric (in all 3 colors!). Just leave me a comment here and I'll randomly draw a winner on Friday 10/26/12. If you have any donkey tales to share, I'd love to hear them. And if not, I'd love to know what you might make from the fabric. As always, international entries welcome. :) And don't forget to include a way for me to contact you. Once you've left me your comment, head over to Erin's blog for loads of other Donkey related projects! There's a darn cute sock donkey project that's calling my name...

Good luck!

Friday, October 19, 2012

New canvas wall art at Oopsy Daisy

I'm super excited to share 6 new canvas wall art pieces with my designs that are now available through Oopsy Daisy. They're each 14x14" which makes them a perfect size to pair or hang in a group. 

I had a great time designing them and am just so tickled with how the turned out. Ostriches on motorcycles and donkeys in new boots. Take a peek, here and I hope they bring a smile to your face! Have a wonderful weekend everyone!


Wednesday, October 17, 2012

Success - Project Raincoat!

For those of you who follow me on Instagram (@lauriewis) or 
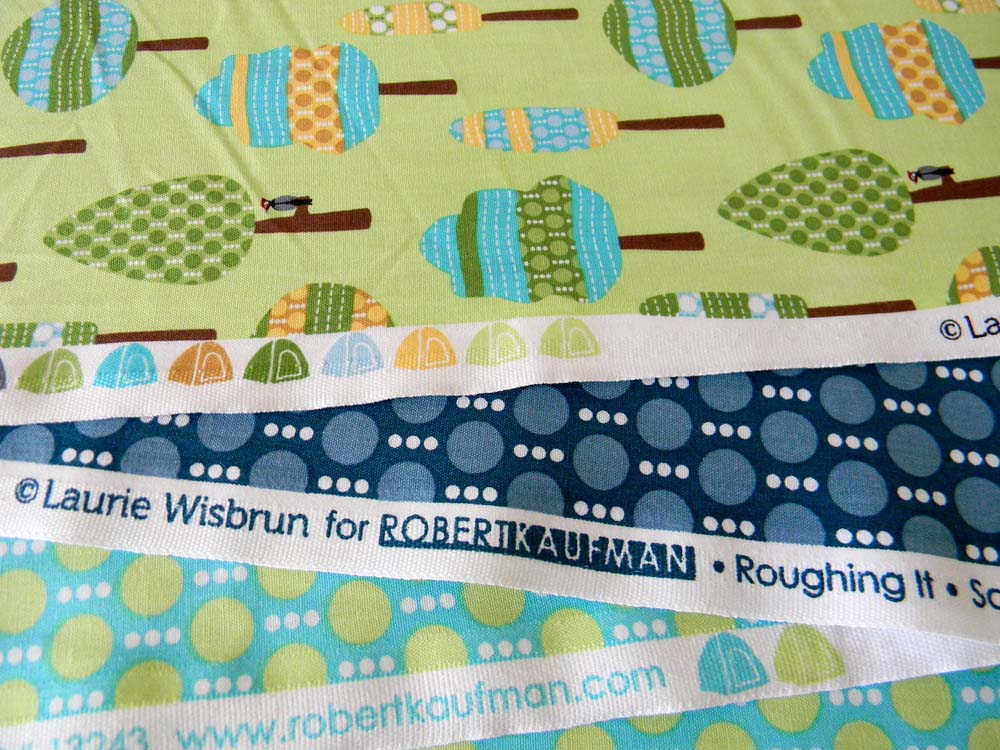
Flickr, you know I've been hard at work at making myself a new raincoat. When I found out that one of the designs in my upcoming fabric collection for Robert Kaufman called Roughing It was going to be printed on slicker fabric (eeeee!), I set my sights on making myself something really special. The little campers are one my all time favorite designs and I really, really wanted a coat for myself out of the fabric.


But frankly, as soon as the statement was out of my mouth, my inner voice piped up and said..."Are you nuts? That sewing project is so far beyond your sewing capabilities! There is no way you can pull that off." But with loads of encouragement from my online pals who convinced me to ignore that negative inner voice, I bit the bullet, ordered a copy of a super cute raincoat pattern from Amy Butler and started gathering up my supplies. And I'm so glad I did it.

This post is a quick recap of the things I learned along the way:

I absolutely loved Amy's pattern. I generally have a hard time following patterns and usually find them somewhat confusing, but this is written in really clear language and has great diagrams to accompany the verbiage. Since I didn't have much extra fabric to work with and really, really didn't want to muck it up, I actually read the steps aloud to myself. And followed my oft-heard mother's advice... measure twice and cut once :)


Amy also has a link to a page with some tips for sewing with laminated fabrics and it was a great help in getting everything prepared for my project. The biggest thing I learned was that sewing with the fabric is really much, much easier if you have the right tools. The slicker fabric is a little fiddly to sew, you really can't pin it without leaving holes and it can be a bit difficult to mark. But with the right tools, all of those things are easily solved. Here's all the goodies I used and each one was really important. Most are listing in Amy's PDF, but a few are my own additions.


Covered buttons kit by Dritz - Who knew that making covered buttons was the world's easiest thing? With the little tool and template, I made all the buttons I needed in minutes. And I love the way that my buttons match the inside lining of my coat (also from the Roughing It collection!)

Teflon foot - It cost me $12 from my local sewing store and am beyond thrilled with the expenditure. I'd heard that you can cover your sewing plate and regular foot with painter's tape and have the same effect, but this just seemed easier. And then when you're sewing the lining (which is from regular quilting cotton), you don't have to keep pulling tape off of your machine. The foot just makes the fabric glide along. And with such long seams and such big pieces of fabric, I felt like the foot really made my machine work well with the fabric. 

Wonder tape - Critical for keeping my pockets in place and in the same spot on both sides since it was a step that can't be pinned or clipped into place.

Smooth edge tracing wheel and wax free tracing paper - Marking the fabric to be cut using the tracing paper with the wheel was definitely time consuming at the front end. I felt like it took hours to get everything laid out and cut. But I think it was just me being nervous that I was going to mess something up before I even started and it probably didn't take as long as I thought it did at the time.

Fabric weights - After cutting the fabric, there were lots of times I needed to go back and re-check something on the pattern (where to start and end a dart etc...) and laying the pattern pieces on top of my cut pieces was made much easier since I had these little weights around. My ceiling fan kept blowing the pattern pieces all over the place and it was making me bonkers so I located the weights in the bottom of my sewing tools box and I was so glad to see them. 

Washi tape and Chalk Cartridge - I used the Washi tape on this project over and over. Marking on the slicker fabric is sort of hard to do. I have a little Dritz chalk marker cartridge (the red thing with the box of chalk sticks) that worked really well though. I initially tried a few different chalk and fabric pencils and nothing really stayed visible for more than a few minutes except the marks from this little tool. But even with those marks, there were tiny and hard to find, so on some steps I used washi tape sort of like you would use post it flags on a document. You know the ones that say "sign here" or whatever? And when I came time to hem my sleeves and the length, I used washi tape along with my seam measurer to guide my cutting. Being 5'2, I had about a 5" hem that I ended up needing to take up at the bottom and the washi tape was a great marking tool. 


The Clover clips. I bought a box of 50 of them through Amazon and they were FABULOUS. Since you can't pin the slicker fabric without putting holes in it, these clips are just perfect. I think they are sold in smaller quantities, but it was $16 really well spent. At one point I think I had all 50 attached to the coat and was so happy to have so many to work with. I can also see using them over and over again for quilt binding. They might just be my new favorite tool!

I broke up the actual sewing of the coat over the course of a week or two so that I wasn't trying to sew when I was exhausted at the end of the day. I really just didn't want to mess it up!

And at the end of it all, I ended up with a coat that I just love. The fabric is the perfect weight and it just feels great. The cut of the coat is modern and really cute. I love the way the hood drapes and its just fitted enough to be stylish, but its not constricting. 

I was lucky enough to get a tip from someone to make the arms bigger so they wouldn't be tight and I'm soooo glad I did that. Had I not, I don't think I would have been happy with the fit. When I got the tip to make the arms bigger, I really wasn't sure how exactly to do that (remember I'm terrible with patterns), but finally figured it out. I cut all of my pattern pieces as size = L except for the sleeve pieces which I cut as size = XXL. And then in the arm hole part of the coat pattern, I cut that at XXL as well so it would match up with the sleeve. And that was perfect for me. Just 'try on' the sleeves to figure out what size you need and then cut your fabric and mark your pieces accordingly from the beginning. 

The only part of the whole pattern I couldn't figure out was the final optional step of making the thread loops to hold the belt in place when its not tied. For the life of me I couldn't (and still can't) figure out all of that looping. So if anyone figures that out, let me know. I think I just need a you tube video so I can actually see it being done. Or if you happen to be planning to go to Quilt Market and want to give me a quick lesson, even better! :)

So...I hope that helps. Even for a relative sewing neophyte like me, the coat came together fairly easily and I am just tickled with the outcome.  And we even had rain here in Austin yesterday so I could test it out. (Thanks to my friend Kevin for being my photographer! xo) If you want to make your own raincoat, I say GO FOR IT! And if you'd like to make one like mine, Roughing It will start shipping this December. Thanks to my online cheering section for the gentle shove :)

I even threw on my most favorite plaid wellies for my front yard photo session :)

It has a matching belt (which I'm sure I will lose if I don't figure out that whole optional step!)

And the hood actually covers my big old mop of curls without mashing them.

Yay!!


Friday, October 12, 2012

Giveaway winner!


Well, as much as I wanted to pack my bag and run off to the woods and go camping this week, my plate was just too full to sneak out with my tent and sit by a campfire. Maybe soon though!! I have high hopes for a camping trip this fall.

I always love reading your comments, but this round, they were really outstanding. Thank you so much for sharing! I love that so many of you are true camping fans while others are reluctant campers. But it seems that nearly everyone had a great camping story (and some great recipes too!). Its always fun to be able to be a part of a walk down memory lane, so thanks for taking me along.

And now, onto the winner of a FQ set of Roughing It. The random number generator picked #60. So congrats to Carrie!!

My favorite camping recipe actually came from my mom. Whenever we went camping when I was a kid she always made "Pocket Stew" which was a piece of tin foil and some frozen vegetables with some cut up beef, garlic salt and some golden mushroom soup that she would then fold up into a pocket and put them in the coals of the fire. Then we would just eat out of the "pockets" so we didn't need to bring any plates. And then we always had s'mores too, but I'm sure you don't need the recipe for that! :) Ahhh good times.


I'm in the process of finishing up another project with my Roughing It fabric (using the slicker fabric of the red campers!) and I'm hoping to get pictures up before end of weekend. I'm just tickled with how its turned out and I simply cannot wait to show you! Eeeee!!


Everyone have a great weekend and thanks again for brightening my week with your great comments!

Tuesday, October 9, 2012

Giveaway | Who wants some Roughing It fabric?

Lookie at what I made for my kitchen. Potholders and a trivet from Roughing It. I really love to camp (and cook around the campfire), so it seemed like a fitting choice for my project. And the colors are just perfect for a Thanksgiving table.  I'm just tickled with the way they turned out.

My favorite cast iron skillet is a perfect match too!


For more details (and links to the tutorials I used), hop over to Craftstorming where Laura has a bunch of fun cooking/baking themed posts as part of her Sew Yummy series.


Roughing It is one of two of my new collections for Robert Kaufman Fabrics that start shipping this December. So if you'd like the chance to get some on your sewing table early, just leave me a comment here before the 12th of October. 

I'd love to hear about your favorite camping recipe or tradition if you have one. And if not, just let me know what you might make with Roughing It. Can't wait to read your stories! The winner will get a full FQ set of the quilting cottons. As always, made sure I have a way to contact you. Good luck!


Fun selvage with tiny tents :)